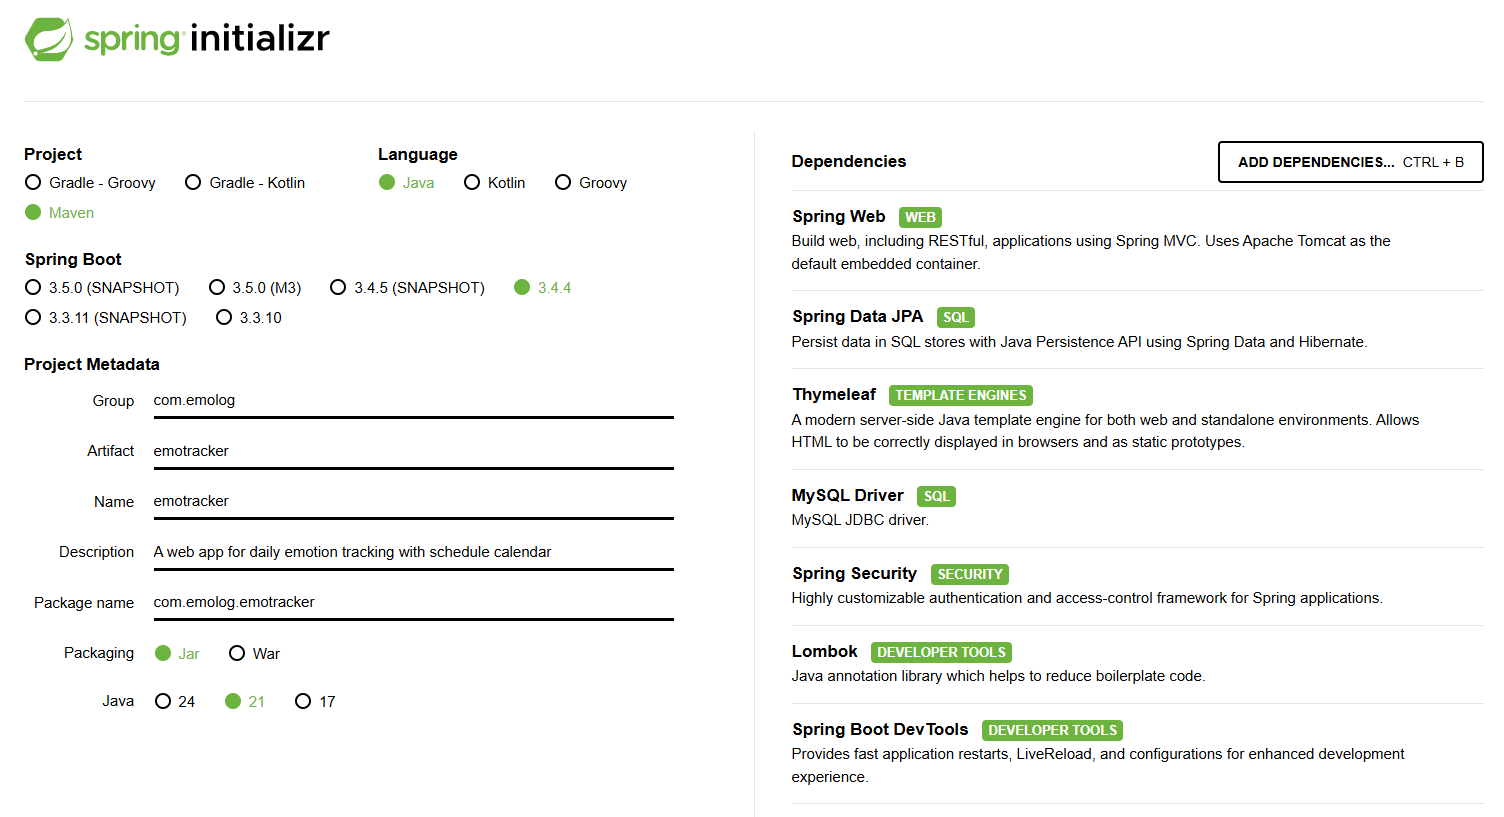
1. spring.io에서 maven 프로젝트 만들기
2. create database
3. final 왜 쓰이는가?
@RequiredArgsConstructor // final 필드에 자동으로 의존성 주입
public class EmotionRecordService {
    private final EmotionRecordRepository emotionRecordRepository;
    private final UserRepository userRepository;
}
- 위 코드에서 emotionRecordRepository와 userRepository는 final로 선언된 이유 : 이렇게 선언하면 이 필드들이 주입 후 절대로 변경되지 않음을 보장해준다.
- 그리고 @RequiredArgsConstructor는 final 필드에 자동으로 생성자를 만들어주기 때문에, 의존성 주입을 편리하게 할 수 있다.
- Spring에서 의존성 주입을 할 때, final 필드를 사용하는 게 일반적이다. 왜냐면, Spring이 객체를 주입해주면, 해당 필드는 한 번만 설정되고 이후에는 변경되지 않기 때문에 코드가 더 직관적이고 안전해진다.
4. .stream() 에 대해서 알아보자.
 // 사용자별 감정 기록 조회
    public List<EmotionRecordResponseDto> getEmotionRecordsByUser(Long userId) {
        User user = userRepository.findById(userId)
                .orElseThrow(() -> new IllegalArgumentException("User not found"));

        List<EmotionRecord> emotionRecords = emotionRecordRepository.findByUser(user);

        return emotionRecords.stream()
                .map(record -> new EmotionRecordResponseDto(
                        record.getId(),
                        record.getDate().toString(),
                        record.getEmotionType().name(),
                        record.getMemo(),
                        record.getImageUrl(),
                        record.getCreatedAt().toString(),
                        record.getUpdatedAt().toString()
                ))
                .collect(Collectors.toList());
    }
: 자바는 스트림을 이용해서 외부 장치에서 데이터 입출력 작업을 수행한다.
자바 책에서 스트림(Stream)을 입출력 작업이라고 설명하는 것은 맥락에 따라 다르게 해석될 수 있습니다. 자바에서 "스트림"이라는 용어는 크게 두 가지 맥락에서 사용됩니다.
1. 입출력 스트림 (Input/Output Stream):
- 이는 데이터를 읽고 쓰는 데 사용되는 바이트 또는 문자 스트림을 의미합니다.
- InputStream, OutputStream, Reader, Writer 등의 클래스가 여기에 속합니다.
- 파일, 네트워크, 콘솔 등 다양한 입출력 소스와 데이터를 주고받을 때 사용됩니다.
- 예를 들어, 파일을 읽어들이거나 네트워크를 통해 데이터를 전송할 때 입출력 스트림을 사용합니다
| * 스트림이란? : 자바입장에서 볼 때 외부 장치에서 데이터가 입력되거나 출력되는 것이 마치 물의 흐름과 같다고 하여 스트림으로 불림. -> 자바 스트림은 자바 프로그램의 입장에서 데이터가 입력 또는 출력해 주는 매개체와 같은 역할을 한다. 각각의 입출력 장치에 맞는 스트림은 클래스로 만들어서 제공하므로 프로그래머는 입출력 장치에 맞게 스트림을 선택해서 데이터를 입출력하면 된다. (자바의 입출력을 도와주는 클래스) * 스트림 클래스의 특징 1. 단방향(FIFO) 2. 같은 용도의 스트림 클래스끼리 연결가능. : 예를 들어 클래스명에 InputStream이 포함되어 있으면 외부 장치에서 프로그램으로 입력되고, OutStream이 포함되어 있으면 데이터가 프로그램에서 장치로 출력한다. |
2. 자바 8 스트림 (Java 8 Stream):
- 이는 컬렉션, 배열 등의 데이터 소스를 처리하기 위한 추상화된 데이터 흐름입니다.
- java.util.stream 패키지에서 제공되며, 데이터를 필터링, 매핑, 정렬, 그룹화하는 등의 연산을 수행합니다.
- .stream() 메소드를 사용하여 컬렉션이나 배열을 스트림으로 변환해 사용합니다.
- 이는 데이터의 흐름을 처리하기 위한 API이며, 직렬화와는 전혀 다른 개념입니다.
- 이는 데이터를 효율적이고 간결하게 처리하기 위한 기능이며, 입출력과는 직접적인 관련이 없습니다.
| * 스트림이란? : 인공지능이나 빅데이터를 처리하는 프로그램은 대용량의 데이터를 처리해야 하므로 객체 지향 개념보다 작업을 빠르게 하는 것이 더 중요하다. 스트림은 대용량의 데이터를 빠르게 처리하기 위해서 도입되었다. * 스트림의 특징 : 자바 프로그래밍 시 데이터는 배열이나 컬렉션 클래스에서 저장해서 사용했으나 각각 저장된 데이터를 가지고 와서 작업하는 방법은 모두 달랐다. 빠른 작업을 위해서 소스에서 표준화된 방법으로 데이터를 가져온 후 연산해야 한다. * 스트림의 장점 1. 람다식을 사용해 간결하게 요소들을 다룰 수 있다. 2. 대용량의 데이터를 병렬로 처리할 수 있다. 3. 데이터를 최종 처리하기 전에 여러가지 중간처리를 할 수 있다. * .map()과 .collect()는 stream() 메서드에서 생성된 스트림 객체에 소속된 메서드입니다. 즉, 스트림 API의 일부입니다. 이 메서드들은 스트림 내의 요소들을 변환하거나 수집하는 데 사용됩니다. .map() 메서드:
.map() 메서드의 주요 특징:
.collect() 메서드:
|
5. 실행하려는데 에러가...

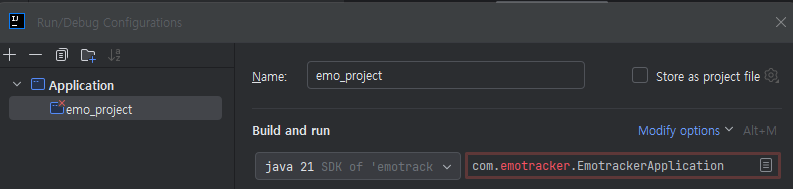

- Maven 재설정 및 프로젝트 불러오기
하씨....
프로젝트 이름안에 또 들어가야 .mvn이 있는데... 폴더 open을 잘못함.
6. 약간의 구조차이 ( "JDBC vs JPA", "MyBatis vs JPA")
🧠 1. Spring Legacy에서는 보통 이렇게 했어 (JDBC / MyBatis)
|
🧠 2. Spring Boot + JPA에서 이렇게 바뀜이제는 쿼리를 직접 쓰지 않고, @Entity 라는 클래스를 만들고그걸 통해 JPA가 쿼리를 "자동 생성"해줘. @Entity public class EmotionRecord { @Id @GeneratedValue private Long id; private LocalDate date; private String memo; @Enumerated(EnumType.STRING) private EmotionType emotionType; @ManyToOne private User user; } 그럼 이걸 기반으로 Repository에서 이렇게 쓸 수 있어: List<EmotionRecord> findByUser(User user); JPA는 이걸 보고 알아서 쿼리를 만들어줘! → 그럼 우리는 쿼리 없이도 데이터 조회/저장이 가능해짐. |
| 📌 그래서 지금 네가 보고 있는 @Entity, DTO, Repository, builder() 이런 것들은 다 Spring Boot + JPA 스타일의 코드 흐름에서 나오는 거야! |
7. postman으로 test 시도.
- 에러발생
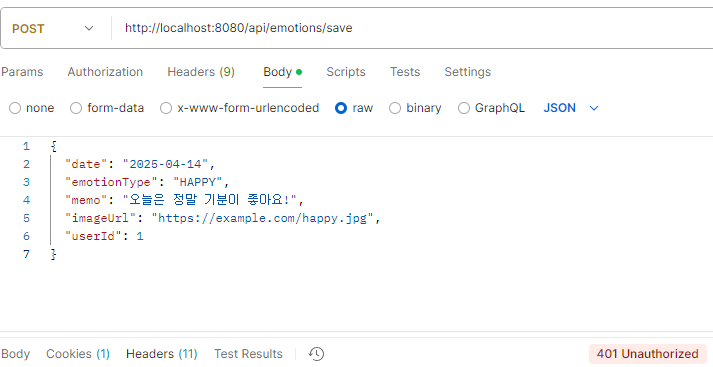
Spring Security 설정 해제 (인증을 사용하지 않으려면)
: 만약 인증을 아예 사용하지 않으려면, 다음과 같이 permitAll()로 모든 경로에 대한 접근을 허용할 수 있습니다. 이 파일은 수동설정해야함. 그래서 일단 SecurityConfig 을 만들었음.
package com.emotracker.config;

import org.springframework.context.annotation.Configuration;
import org.springframework.security.config.annotation.web.builders.HttpSecurity;
import org.springframework.security.config.annotation.web.configuration.EnableWebSecurity;
import org.springframework.security.config.annotation.web.configuration.WebSecurityConfigurerAdapter;

@Configuration
@EnableWebSecurity
public class SecurityConfig extends WebSecurityConfigurerAdapter {

    @Override
    protected void configure(HttpSecurity http) throws Exception {
        http
            .csrf().disable()  // CSRF 비활성화
            .authorizeRequests()
            .antMatchers("/**").permitAll()  // 모든 경로에 대해 인증 없이 접근 가능
            .anyRequest().authenticated();  // 그 외 다른 경로는 인증 필요
    }
}
: 에러가 난다. 버전이 맞지 않고 어쩌구...
package com.emotracker.config;

import org.springframework.context.annotation.Bean;
import org.springframework.context.annotation.Configuration;
import org.springframework.security.config.annotation.web.builders.HttpSecurity;
import org.springframework.security.config.annotation.web.configuration.EnableWebSecurity;
import org.springframework.security.web.SecurityFilterChain;

@Configuration
@EnableWebSecurity // Spring Security 활성화
public class SecurityConfig {

    @Bean
    public SecurityFilterChain securityFilterChain(HttpSecurity http) throws Exception {
        http
            .csrf(csrf -> csrf.disable()) // API 서버이므로 CSRF 보호 비활성화 (웹 애플리케이션의 경우 활성화 권장)
            .authorizeHttpRequests(authz -> authz
                .requestMatchers("/api/emotions/**").permitAll() // 해당 경로는 인증 없이 접근 가능
                .anyRequest().authenticated() // 그 외의 요청은 인증이 필요함
            );

        return http.build();
    }
}
: 해결함. 일단 csrf는 postman을 사용할 거기 때문에 .disble로 비활성화 했다. 그리고 저 주소로 가는 것은 인증없이 되도록 함.

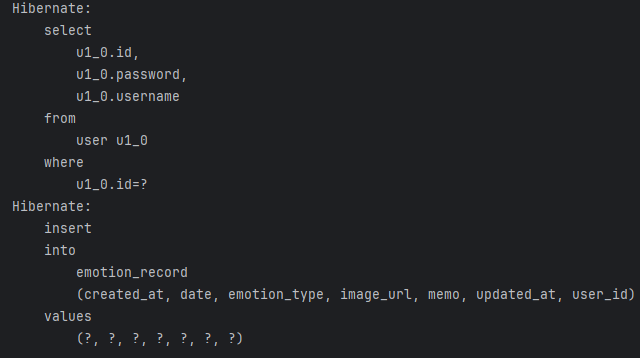
& DB에도 잘 들어옴.
✅ 프로젝트 1일차 진행 정리
📁 프로젝트 정보
- 프로젝트명: Emotracker
- 구조: Spring Boot (Maven) + JPA + Spring Security + Thymeleaf
- 목표: 감정 기록 웹 애플리케이션 개발 (로그인 + 감정 기록 + 조회 등)
✅ 진행한 작업
🔹 1. 프로젝트 생성 및 환경 설정
- Spring Initializr에서 Maven 프로젝트 생성
- 의존성 추가: Spring Web, Thymeleaf, Spring Data JPA, MySQL Driver, Spring Security, Lombok
- application.yml 파일 생성 및 DB 연결 정보 설정
- IntelliJ로 열고 구조 확인
🔹 2. 도메인 및 DTO 설계
- EmotionType enum: 감정 종류 정의
- EmotionRecord Entity: 감정 기록 테이블 생성
- User Entity (기본 구조만, 로그인 미구현 상태)
- DTO 클래스 작성:
- EmotionRecordRequestDto
- EmotionRecordResponseDto
🔹 3. Repository & Service 구성
- EmotionRecordRepository 인터페이스 작성 (JPA)
- EmotionRecordService: 감정 기록 저장 / 조회 로직 구현
- saveEmotionRecord(dto, userId)
- getEmotionRecordsByUser(userId)
🔹 4. Controller 구성 및 테스트
- EmotionRecordController 작성
- @PostMapping("/api/emotions") – 감정 기록 저장
- @GetMapping("/api/emotions") – 감정 기록 조회
- 임시로 fakeUserId = 1L 사용 중
🔹 5. Spring Security 설정
- SecurityConfig 클래스 생성
- CSRF 비활성화, 모든 경로 permitAll() 처리
- 최신 버전 대응 (Spring Security 6.x 방식)
🔹 6. Postman 테스트 완료 ✅
- POST /api/emotions → 감정 저장 성공
- GET /api/emotions → 감정 리스트 조회 성공
- 디버깅도 IntelliJ에서 가능하도록 설명 받음

